Showing posts with label diy. Show all posts

WWPD 2013: Instant Pinhole Camera in a Ciggy Pack

Smoking is such a bad, bad habit and all of us smokers should quit asap for our own good and for the people around us as well. While working on it, though, we could still turn empty cigarette packs into very basic pinhole cameras. Of course you could follow this tutorial and turn it into a 35mm pinhole camera, but as you can see in the picture below, the average cigarette pack has the same size of Fuji Instax mini film, so you may want to try making an Instant Pinhole Camera!


You will need: a pack of cigarettes, black electrical tape, a piece of aluminum (you can cut it out of an empty soda can), a pin, scissors and a marker... and instant film, of course!

First, take your ciggy pack and take out the plastic wrapping outside and the silver paper inside.


Mark the centre of the film area (you can use an old instax photo to get the idea).


Draw a little square there...
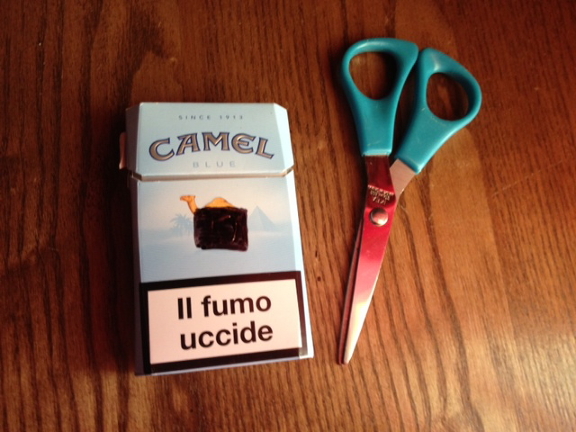

And cut it out.


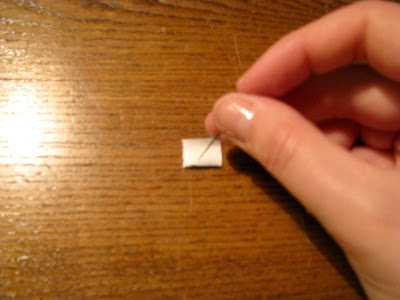
Now you will need a piece of thin tin that  you can easily cut out of an empty soda can. Pierce a hole through it using a pin...


...And tape it on the pack's window that you've just cut out.


You can now start covering your whole camera with black tape to make it light-proof, except for the part that needs to be opened in order to put the film inside it. The black tape I use is quite large, so I decided to leave some extra tape already half-glued to the pack so that it was easier for me to completely wrap my camera with tape in the darkness after inserting the film.


By the way, you will have to put the film in with its back facing the pinhole [see picture below], but DO NOT insert film now: you can only do so in a completely dark room!


Before putting the film in, you will have to make some sort of a shutter, or light will leak in through the pinhole. I made mine folding a long piece of tape on itself. I put it on the front of my camera and taped it with a red tape band on top to keep in place and another smaller piece of red tape on bottom which keeps the shutter closed. To open it, I only have to lift the red tape and the shutter itself.


Now that your camera is almost entirely light-proof, you can finally put the film in it. This is the most difficult part of this project, so let's first talk about the issues and then let's (try to) find a solution.

As you already know, instant film comes in cartridges, and it's not easy to take single film "sheets" out of it. If you have an "Instant Back+":http://shop.lomography.com/it/accessories/camera-accessories/backs/lc-a-instant-back , no problem: you can build a DIY Instant Pinhole Camera like this one  and the Instant Back+ will do all the dirty job for you.

The camera we're building here does not require an Instant Back+, but this means that we have to use this camera with one film sheet at a time, as it would be quite difficult to build a mechanism that ejects a single sheet of film at a time.

So, basically, we will take the ten film sheets out of the cartridge in complete darkness, put one in the camera, take a picture, go back to our "darkroom", take the film out, press the white edges where the chemical stuff is to develop the picture, turn on the lights and finally see our picture.

This is going to take some time, and in order not to waste the film you will have to keep the nine sheets yet to be exposed in a light tight container and repeat the whole process each time you want to use this instant pinhole camera. 

Frankly, this would be quite a drag, especially if you consider that it takes more time to put the film into the camera than making the camera itself. That's why I decided to make more than just one camera, so that once I opened the cartridge I could already put all the ten film sheets in different pinhole cameras and have them ready to use.

So, here are two other instant pinhole cameras I made out of cigarette packs:


What happened to the other seven sheets of film from that same cartridge, you ask?

I made some other pinhole cameras which are quite different from this project. If you're curious about it, just drop by in the next few days as I'll be sharing them here on my blog.

Back to this current project, another major problem when you do not have an Instax Back+ is that you will have to find a way to press the chemicals contained in the white parts of the film in order to develop your picture.

The thing is: if you don't press it enough, the photo will not fully develop; at the same time, if you push it too much, you will end up with a black liquid endlessly flowing out of your film. This personally happened to me when I was trying to develop the first picture I took with my DIY single use instant pinhole camera:


You can now only see a tiny black stain in the corner, but you cannot even imagine how my kitchen sink looked after the film started bleeding an awful lot black ink or whatever it was!

This photo was a total failure: I tried to develop it rolling a pencil on it a few times, so many times, actually, and pushing it so much that it started spilling that black thing.

Yet, the picture was still looking too pale, so I had the not-so-brilliant idea of heating the film using a lighter. The photo turned a bit purple at the beginning, then all of a sudden it turned all blue.

Thankfully, I was way luckier with the second trial:

This time the picture looks pinkish because right after taking my photo I put my pinhole camera in the freezer and left it there for a couple of minutes, and only then I took it to my darkroom to take the picture out and develop it. This time I pressed it more gently, rubbing the white parts with my fingers only, and the results are better, I guess... If you do not consider the fact that I was aiming at my dogs but didn't apparently managed to get them in my picture.

I haven't tested the third ciggy-cam yet as I want to keep it for World Pinhole Photography Day next April 28th, but again, I'll share that picture and other shots from all the pinhole cameras I've built for the occasion here as soon as I get to process them.

So lastly, a quick recap:

1. Make your camera, cover the pinhole with the shutter, make sure no light is leaking in and only leave the upper part of the ciggy pack to put the film in.

2. You will have to go to a completely dark room to open the film cartridge and load the film to your camera.

3. Use the exposure guide below to determine how long to keep the shutter open [remember that Fuji Instax Mini film is a ISO800 film].


4. Once you've taken your picture, close the shutter and keep the camera closed until you get into the darkroom again.

5. Once there, open the camera, take the film out, and press the white edges to make the developing process start. Do not press too much or you'll end up with black chemical stuff everywhere!

6. Only turn on the light after you pressed the film, starting the developing process. If you expose the film before it is beginning to develop, it will be light-sensitive still, and you will burn it.

7. Once you've opened it, the film cartridge cannot be exposed to light. Keep it in a light-tight container. You can build one using another pack of cigarettes completely covered with black tape. Otherwise, make a pinhole camera for each of the ten film sheets in pack so that you will have them ready to use.

I really hope you enjoyed this clumsy tutorial and had fun making your own instant pinhole camera in a ciggy pack. If you have any advice or want to share any pinhole-related story, I'd be more than happy to hear them!

Feeling the Pinhole DIY Fever? How about making your own 35mm pinhole camera out of a chewing gum box ? Wanna try something a little more complicated? This tutorial to make a 35mm camera out of an empty film pack can feel quite challenging. Love the tiny 110 film? You definitely gotta take a look at this 110 pinhole camera tutorial! Still want more instant film pinhole goodness? Then this DIY Instant Pinhole Camera is absolutely worth checking out!


WWPD 2013: 110 Film Pinhole Camera Tutorial

To celebrate this year's World Pinhole Photography Day, I've been making pinhole cameras in all the film formats I'm familiar with: 35mm, 120, instant film and now... 110!

Since Lomography brought back 110 film, I’ve been thinking about making a 110 pinhole camera. I was pretty worried that, with such a tiny format, the pictures’ quality would not be outstanding, but hey, we’re plastic-lens-lovers, aren’t we? So nevermind quality and let’s have some crafty fun!


So, here's how I made my baby pinhole camera. 
All you need is: a 110 film cartridge, a not-so-big piece of cardboard, a pencil, a ruler, a little piece of tin (you can cut it out off any can), a pin, black/dark electrical tape and scissors (and maybe a cutter or an x-acto knife)... nothing fancy, as you can see!

First things first: let's take a look at the anatomy of 110 film.
Here we can see the top and back sides of the cartridge, where the film counter is...


...While here's the front/bottom sides with the film and the advance wheel.


Once we'll be taping our cartridge to make it light-proof, the only two things we will never ever cover with tape are the exposure counter and this tiny little wheel here, which is the only way we have to advance film.


Now, the first thing I did was measuring the distance between the two bumps on the front of the cartridge. 


Then I measured both the height and depth of the cartridge and cut a small rectangle out of my piece cardboard, tracing on it the outline of both the top and the bottom of the cartridge.


Next I traced the diagonals in the part corresponding to the front and drew a small rectangle there too...


...Which I then cut out...


Here's where the little piece of tin foil will be, i.e. here's where the pinhole will be.
So I flipped the whole thing and taped the tin foil bit on the back of my cardboard "camera body".


I then flipped my cardboard piece again and I marked the tin foil-rectangle's diagonals too and, using a pin, I pierced a hole in the centre of it.


Now I was ready to tape the carboard to the cartridge. As I was using some recycled cardboard, I taped it with some washy tape. 


If you wish to do the same, be careful: you will either avoid covering the piece of tin foil, or you'll have to pierce a hole through the tape (like I did) for the pinhole.


Also, remember not to cover the back of the cartridge (where the exposure counter is) and the advancing wheel on the bottom.


Everything is now in place, so it's time to make sure the pinhole camera is truly light-proof. I know Lomographers LOVE light leaks, but when it comes to pinhole cameras, light leaking in means best case scenario, über-exposed pictures, or, mostly, burnt pictures.
I don't know what's going on 'round here, but I went to three different hardware stores and couldn't find black electrical tape, so I bought three rolls of blue tape and used two layers. 
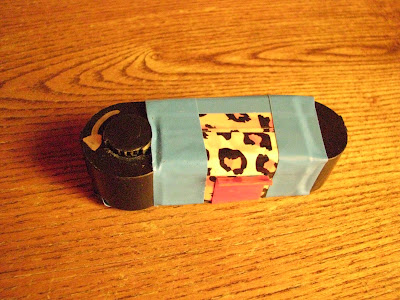
Anyway, here's the mummy/pinhole camera, 100%light-proof (except for the pinhole, of course).


Last but not least, the shutter. Mine is really simple: just take a piece of black tape and stick it on the pinhole. (I folded the last bit of it on itself so that it doesn't stick to the "camera" and it's easier to lift).  I used blue tape and covered it with red tape just because. Do not use red tape only as the light would definitely leak in.


Lift it up to take a picture...


Stick it back to close the shutter.


Turn the advance wheel counter-clockwise to go to the next frame. It was a bit stiff at the beginning so I had to use my car keys to move it, then it became smoother, so don't worry if it seems to be stuck, just force it a bit and it will work.


I absolutely love the exposure counter on the back: it makes 110 pinhole cameras much more convenient than those in the 35mm format!


I've built this camera for World Pinhole Photography Day, which is next April 28th, so I haven't tested it yet, but in case you want to build a pinhole camera and need an exposure guide, I'd recommend the one that comes with the Diana Multi Pinhole Operator. If you use Lomography Color Tiger film like I did, remember that it is an ISO200 film.


I will share my results (or whine about my epic failure) as soon as I get the roll developed. 
With World Pinhole Photography Day just a few days ahead, fancy building a pinhole camera yourself?

Dark Dark Dark


Barely lit indoor trials with my Instant Pinhole Camera. If you feel like making your own instant pinhole camera, here's the tutorial I shared last year, or click here to see how to turn an empty film box into a 35mm pinhole camera. More pinhole tutorials on their way :-)

WWPD Project #2: 35mm Pinhole Camera Out Of An Empty Film Box Tutorial

Most of us film enthusiast tend to stack up empty film boxes everywhere wishing to recycle them in a clever way. Here's just one of the many cool things you can do with them - pinhole cameras! For my second project for this year's Worldwide Pinhole Photography Day I decided to make a pinhole camera for 35mm film with one of these boxes and a few basic things you can easily find at home.


This is what you will need:


• An empty box of Lomography 35mm film or any other pack of three rolls [or a box approx 11x5cm]
• A fresh roll of 35mm film • An empty roll of 35mm film with a tiny piece of film at the end coming out of the canister • One paper clip


• Adhesive tape [and also masking tape, if you feel like adding a little color to your pinhole camera]
• A thick piece of aluminum foil [you can cut it out of an empty soda can] • A needle • Scissors and a cutter • Black vynil electrical tape • Pencil & ruler • Stapler


First of all, you'll need an empty box of film. I'm using one of Lomography's tri-pack boxes as I have loads laying around in many drawers in my bedroom. Carefully open your box and lay it flat, then remove any traces of glue from it.


Copy this design on the back of your box [click on picture to see it bigger]. You can see the measurements marked here in the bigger picture, or you can figure them out yourself using a film roll to see how to fit it perfectly in your box.


Draw the diagonals [see the green lines in the picture] to find where to put your pinhole [it will replace the red square in the centre] and where to cut the two holes for the top of the two film canisters.


Cut along the red lines and cut out the parts colored in red.


Fold along the black lines. You can use a ruler to fold the cardboard straight.


You can cut out the external parts covered by the ruler in these two pictures, or you can fold them and glue them to the sides of your box as you like.


You will now need a piece of aluminum foil thick enough to pierce a sharp, tiny hole in it, and a needle. You can cut a piece of aluminum out of an empty soda can [be careful!]. The window I cut out for the pinhole was 1x1cm, so if you follow my design and measurements you could cut a piece of aluminum a little bigger than it [mine is approx 1,2x1,5cm, but this really is up to you].


The pinhole, as the name suggests, has to be really tiny: you will only have to push the tip of your needle through the foil.


Remember this simple rule in pinhole photography: the smaller the pinhole, the sharper the picture.


Using black vynil elecrtical tape, tape the aluminum foil to the box [the central diagonals will show you where to place the pinhole].


As some of the original folding lines are now in the middle of the sides of your box, you may want to use some tape to prevent them from bending.


You can now properly build your camera. I started folding the upper side of my box and then I used both staples and tape to keep everything in place [pay attention not to tape the two holes for the top of the canisters!].


When your box looks somewhat like this one below, it's time to get your rolls out.


First, take a fresh roll of film.


Cut the leader off.


Tape the new film [the 100 ISO roll in my picture] to the end of the old one [the 200 ISO roll in my picture]. The new film must be placed with the top of its canister on the bottom, unless you wish to take redscale pictures. In case, you will have to place the new film with its top facing the upper side of your box, and you will have to pierce a hole on the upper left side of the box [instead of the lower left side as marked in my design].


You can now load the film into your soon-to-be pinhole camera so that the two tops of the canisters come out of the two holes we cut out in the box.


Close the back door using black vynil tape.


Now you will have to tape any possible hole or slit on your camera to make it light-tight [use black vynil tape first, then you can add masking tape, stickers, anything you like to customize your camera].


You can now fit the paper clip in the top of the empty canister to use it as your own advance wheel. After each shot you will have to turn the paper clip counter-clockwise twice to move to the next frame


Every camera needs a shutter, and so does your brand new pinhole camera! You can use a piece of black tape that you can remove whenever you want to expose your film and than put back in place before moving to the next shot, or you can try to add a sort of slide shutter to your camera like I did. The best thing about sliding-shutters is that you can use them as color filter holders!


So here's how my camera looks when the shutter is closed...


...And here's how it looks when the shutter is open!


Now you're ready to take your camera out and take some cool pictures, just remember that you will have to turn the paper clip counter-clockwise twice each time you take a picture to advance to the next frame. You will also need to hold your pinhole camera still when you take a photo [you can put it on something steady like a table, a stack of books...].


nce again, take a look at this Exposure Guide which comes with the Diana Multi Pinhole Operator and keep your shutter open according to the amount of time stated in this useful guide [I definitely need to print this out and stick it to the back of each of the pinhole cameras I've built].


Now you really are ready to shoot - Have fun with your new pinhole camera!


Article on Lomography.com | LomoHome | Flickr